Blockchain with Android Java / MacOS

I. Installation

  1. Prepare environment
    • Install nodejs
      • Download from the official site
    • Install web3
      • npm install web3
    • Install Ethereum – TestRpc
      • npm install -g ethereumjs-testrpc
    • Install solidity
      • npm install -g solc
  2. Checking
    1. node -v
    2. npm -v
    3. solcjs –version
  3. Create contract in solidity:
    1. create file BIoT.sol in folder /Volumes/JetDrive130/LEARNING/Solidity/
    2. The content of file
    3. //Created by Henry Pham
      pragma solidity >=0.5.0 <0.7.0;

      contract BIoTStorage {
      string public farmlogo;
      string public farmname;
      string public foodname;
      string public farmaddress;
      string public position;
      string public humidity;
      string public temperature;
      function setFarmLogo(string memory _farmLogo) public {
      farmlogo = _farmLogo;
      }
      function setFarm_FoodInfor(string memory _farmname, string memory _farmaddress, string memory _position, string memory _foodname, string memory _humidity, string memory _temperature) public {
      farmname = _farmname;
      farmaddress =_farmaddress;
      position = _position;
      foodname = _foodname;
      humidity = _humidity;
      temperature = _temperature;
      }
      function getFarmLogo() public view returns (string memory){
      return farmlogo;
      }

      function getFarm_FoodInfor() public view returns (string memory _fn, string memory _fa, string memory _position, string memory _foodname, string memory _humidity, string memory _temperature){
      _fn = farmname;
      _fa =farmaddress;
      _position =position;
      _foodname =foodname;
      _humidity =humidity;
      _temperature =temperature;
      return (_fn, _fa, _position, _foodname,_humidity, _temperature);
      }

      }

II. Compiling

  1. Solidity
    1. Theory: solc greeter.sol –bin –abi –optimize -o <output-dir>/
    2. Practice: solcjs /Volumes/JetDrive130/LEARNING/Solidity/BIoT.sol –bin –abi –optimize -o /Volumes/JetDrive130/Learning/Solidity/
  2. To generate the wrappers you run
    1. Install web3j CLI:
      1. Down load from: (or wget) https://github.com/web3j/web3j/releases/download/v4.1.0/web3j-4.1.0.tar
      2. export PATH=$PATH:~/web3j-4.1.0/bin
    2. Theory:
      web3j solidity generate /path/to/<smartcontract>.bin /path/to/<smartcontract>.abi o /path/to/src/main/java p com.your.organisation.name
    3. Practice:

Bluetooth on Raspberry Pi

Setup Python program as boot service:

sudo chmod +x /home/pi/foodsupplychain/foodsupplychain.py

sudo nano /etc/systemd/system/foodsupplychain.service

and copy content:

[Unit]

Description=Raspberry PI Bluetooth Server

After=bluetooth.target

[Service]

Type=simple

User=root

Group=root

WorkingDirectory=/home/pi/foodsupplychain

ExecStart=/usr/bin/python /home/pi/foodsupplychain/foodsupplychain.py -l /home/pi/foodsupplychain/foodsupplychain.log

[Install]

WantedBy=multi-user.target

sudo chmod 644 /etc/systemd/system/foodsupplychain.service

sudo systemctl daemon-reload

sudo systemctl enable foodsupplychain.service

sudo systemctl start foodsupplychain.service

sudo systemctl status foodsupplychain.service

sudo reboot


Enable Bluetooth:

hciconfig -a
sudo systemctl start bluetooth
systemctl status bluetooth

systemctl status hciuart.service

systemctl start hciuart.service

—Install rules:

sudo apt-get update

sudo apt-get dist-upgrade

sudo rm /etc/udev/rules.d/99-com.rules

sudo apt-get -o Dpkg::Options::=”–force-confmiss” install –reinstall raspberrypi-sys-mods

sudo apt-get install pi-bluetooth

sudo apt-get –reinstall install pi-bluetooth

systemctl status hciuart.service

sudo apt-get install –reinstall raspberrypi-sys-mods

sudo systemctl reboot


sudo /usr/bin/hciattach /dev/ttyAMA0 bcm43xx 921600 noflow –

sudo nano /lib/systemd/system/hciuart.service

Add line: ExecStart=/usr/bin/hciattach /dev/serial1 bcm43xx 921600 noflow –

sudo nano /boot/cmdline.txt

sudo nano /boot/config.txt

Add this line at the bottom:

enable_uart=1

core_freq=250


apt-get update
apt-get install firmware-brcm80211 pi-bluetooth wpasupplicant


ls /dev/serial*

ls l /dev

sudo systemctl enable serial-getty@ttyAMA0

sudo systemctl enable getty@ttyS0


sudo nano  /lib/systemd/system/hciuart.service

[Unit]

Description=Configure Bluetooth Modems connected by UART

ConditionPathIsDirectory=/proc/device-tree/soc/gpio@7e200000/bt_pins

Before=bluetooth.service

After=dev-serial1.device

[Service]

Type=forking

ExecStart=/usr/bin/hciattach /dev/serial1 bcm43xx 921600 noflow –

[Install]

WantedBy=multi-user.target


  • sudo apt-get install  pi-bluetooth blueman
  • sudo service bluetooth start
  • sudo service bluetooth status

Terminal

The quickest way to get your Bluetooth devices paired to your Raspberry Pi is through Terminal.

  • From the Raspberry Pi desktop, open a new Terminal window.
  • Type sudo bluetoothctl then press enter and input the administrator password (the default password is raspberry).
  • Next, enter agent onand press enter. Then type default-agent and press enter.
  • Type scan onand press enter one more time. The unique addresses of all the Bluetooth devices around the Raspberry Pi will appear and look something like an alphanumeric XX:XX:XX:XX:XX:XX. If you make the device you want to pair discoverable (or put it into pairing mode), the device nickname may appear to the right of the address. If not, you will have to do a little trial and error or waiting to find the correct device.
  • To pair the device, type pair [device Bluetooth address]. The command will look something like pair XX:XX:XX:XX:XX:XX.

If you’re pairing a keyboard, you will need to enter a six-digit string of numbers. You will see that the device has been paired, but it may not have connected. To connect the device, type connect XX:XX:XX:XX:XX:XX.

Now you can toss that ancient wired keyboard in the junk drawer of your desk until you reflash your Raspberry Pi tomorrow

How to setup SSH and Remote Access to Raspberry Pi Raspbian by MacBook using VNC

I. Setup SSH

  1. Dynamic IP:

First things first, get a ethernet cable.

Hook the cable up to your Raspberry Pi and Mac.

Power up the Raspberry Pi.

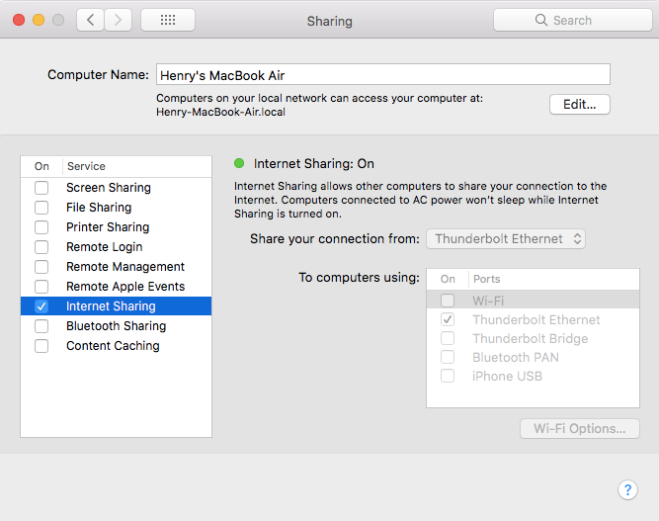
Next, we need to enable Internet Sharing.

Go to System Preferences -> Sharing.

Screen Shot 2019-04-08 at 4.22.34 PM

Select Thunderbolt Ethernet (or whatever option that is being used as the ethernet connection).

Enable the Internet Sharing option if it isn’t already selected.

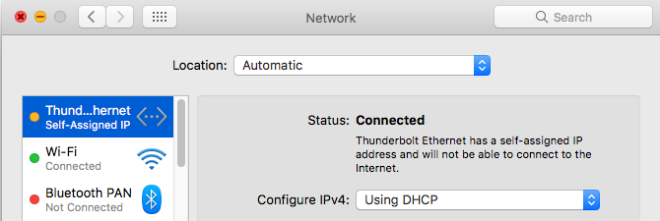
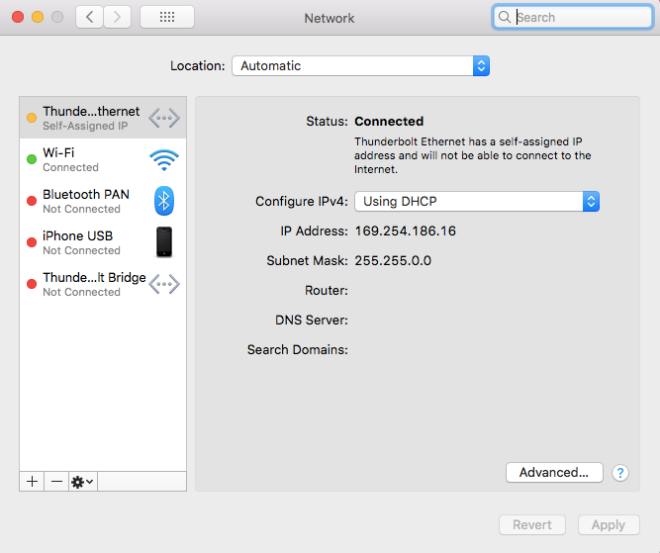
After that, open up System Preferences -> Network.

You should be able to see that Using DHCP is selected by default. Use the dropdown menu to select this option if it’s not already selected.

Next, you should be able to see the Connected status on that same page, and an IP address should have been assigned to you.

Screen Shot 2019-04-08 at 4.23.39 PM

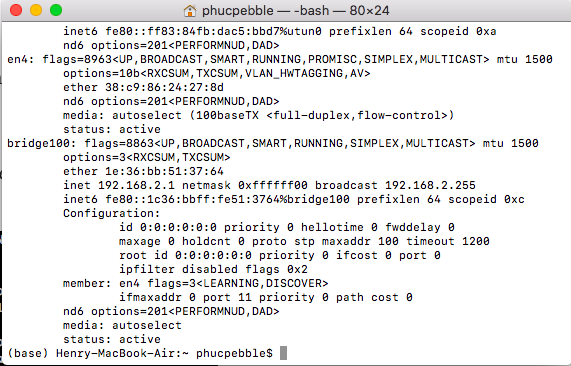
Go ahead and pull out your favorite terminal. I am a fan of iTerm, but the default Mac Terminal works just fine. You can find this by going to Applications -> Utilities -> Terminal.

Type in ifconfig, and you should see a bridge100 option.

Screen Shot 2019-04-08 at 4.13.18 PM

Look for the inet field. In this case, mine is 192.168.2.1. Yours might be different.

Next, type in

nmap -n -sP 192.168.2.1/24


into the terminal. For my case, I would do


nmap

After you run this, there will be multiple scan reports that show up here.

Notice that the first one for me is 192.168.2.1, which is similar to what I have when I typed ifconfig. This is basically my local machine itself.

You want to select the other option, which is your Raspberry Pi. In my case, that’ll be 192.168.2.2

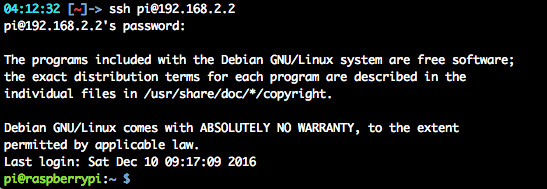
Go ahead and ssh into the Pi

Finally, go ahead and ssh into the Pi by typing

ssh pi@192.168.1.2

Type in your password, and if you did that correctly, yay, you’re in!

Congrats! You’re now connected to your Pi with just an ethernet cable 🙂


  1.  Note:
    • SSH to Raspberry PI: ssh pi@192.168.1.2   default pass: raspberry
  2. Install tightVNC on Raspberry: (Might have internet connection)
    • sudo apt-get updatesudo apt-get install tightvncserver
    • vncserver :1 -geometry 1024×768 -depth 24.
  3.  Start a remote VNC session on your Mac

This is really easy, because the Mac comes equiped with VNC software, so we don’t need to install anything new. From finder press cmd+k to bring up a new Server prompt. In the server address field type:

vnc://192.168.1.2:5901


The 1 in “5901” corresponds to the “X” session number you want to link to. You will then be prompted asking for the pairing password you set up previously. You should now have a window pop up with access to the desktop on your Pi!!


  • To enable VNC: vncserver
  • Check VNC services running on 5901: sudo netstat -tulpn
  • To kill VNC: vncserver -kill :1
  • Setup automatically run VNC:
    • Automatic Startup: 
    • sudo nano /etc/systemd/system/tightvncserver.service
    • put the code as below:
    • [Unit]
    • Description=TightVNC remote desktop server
    • After=sshd.service
    •  
    • [Service]
    • Type=dbus
    • ExecStart=/usr/bin/tightvncserver :1
    • User=pi
    • Type=forking
    •  
    • [Install]
    • WantedBy=multi-user.target

Change the file so it is owned by root
sudo chown root:root /etc/systemd/system/tightvncserver.service

Make the file executable by running
sudo chmod 755 /etc/systemd/system/tightvncserver.service


Unity learning

I noted the important points that they are extremely useful to build a 3D game in Unity.

Let join with me !

(Open 2 Unity at the same time in MacOS:

From the terminal in Mac OS:

  1. open -na Unity)
  1. Layer:
    • Add new layers:
      • Background: Sky, ground: Can drag to link together. Add Rigid body to have physical attitude + Box collider 2D.
      • Midground
      • Foreground
      • UI
  2. UI element:
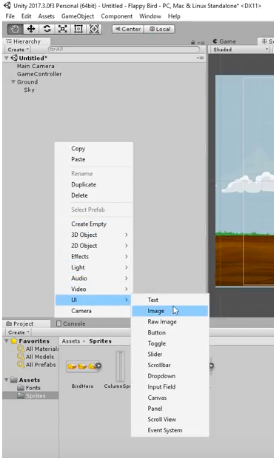
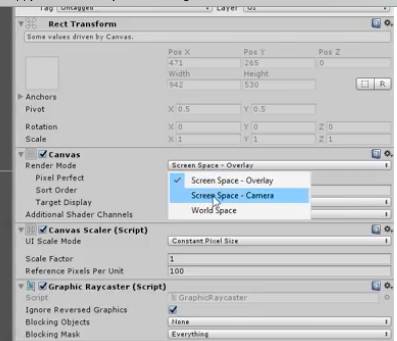
  • Add UI element -> Select Canvas
    1. Screen Shot 2018-11-30 at 11.20.41
    2. Delete EventSystem (Default having)
    3. Canvas property: Choose Render Mode: Screen Space – Camera.Screen Shot 2018-11-30 at 11.23.21
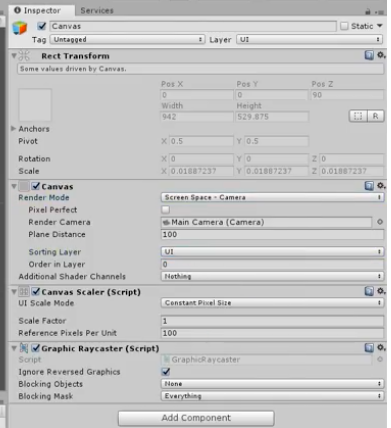
    4. And then, drag Main camera to Render Camera:
    5. Screen Shot 2018-11-30 at 11.25.12
    6. Change Sorting layer to UI:
    7. Screen Shot 2018-11-30 at 11.27.04
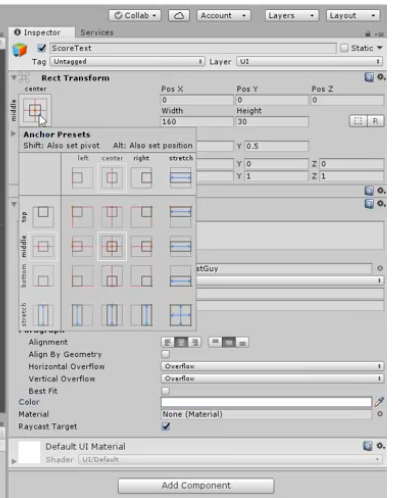
    8. Insert Score Text:
      • Click Canvas -> Insert UI -> Text: name ScoreText, content: Scores: 0
      • Edit font, size, color, position, horizontal + vertical overflow: Overflow
      • Screen Shot 2018-11-30 at 11.33.57
      • Screen Shot 2018-11-30 at 11.29.46
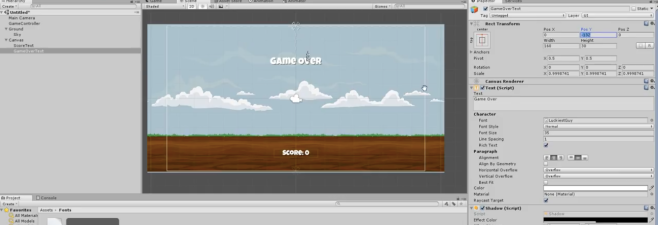
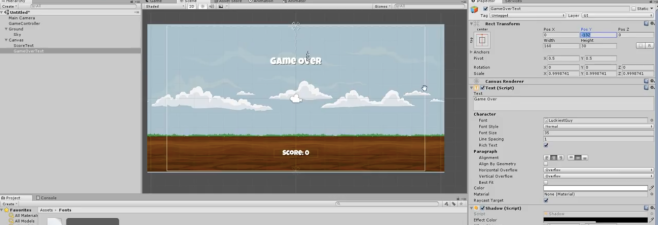
      •  Add Game Over text:
      • Screen Shot 2018-11-30 at 11.37.03
    9. Coding: Game controller: 
      • Add empty object -> Put name Game Controller -> Add component -> Add scripting ->C#
      • Some parameters:
        • public static Gamecontrol Instance;
        • public GameObject Gameovertext;
        • public Text scoreText;
        • void Awake(): Function before start
        • Update(){
          • ScreenManager.Loadscreen()
        • }
  1. Screen Shot 2018-11-30 at 11.39.35
  2. Drag Score Text and Game over Text in Canvas in to Inspector in Game Controller: Link to function in Game controller
  3. Screen Shot 2018-11-30 at 11.37.03
  4. Animation object
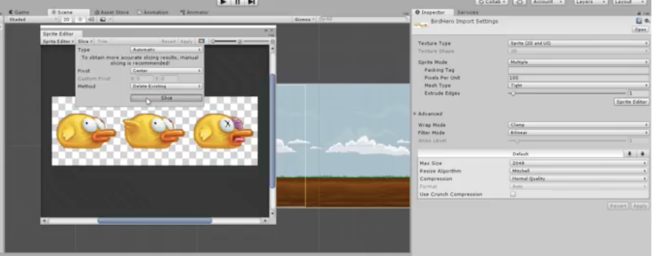
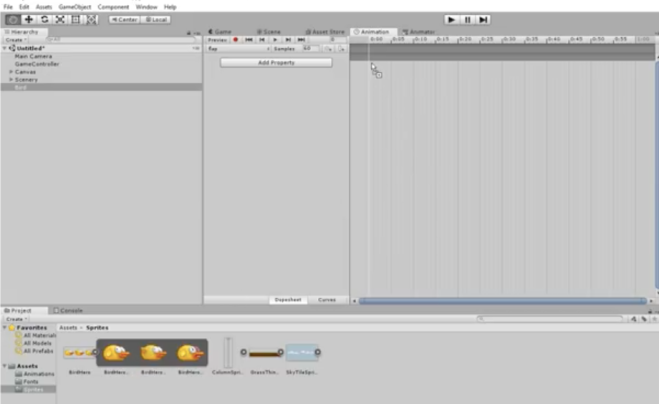
    • Select items you want to import -> Inspector -> Sprite mode -> Multiple.
    • Click Sprite Editor -> After that selecting Slice -> select Automatic type -> Slide –> Apply.
    • Screen Shot 2018-11-30 at 15.31.39
    • Drag this animation to the scene -> select appropriate layer.
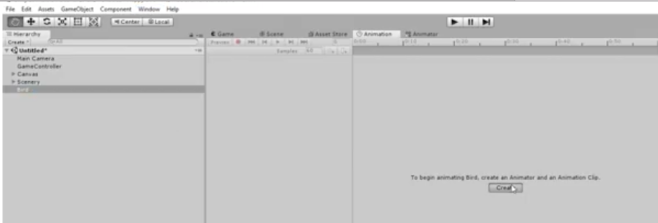
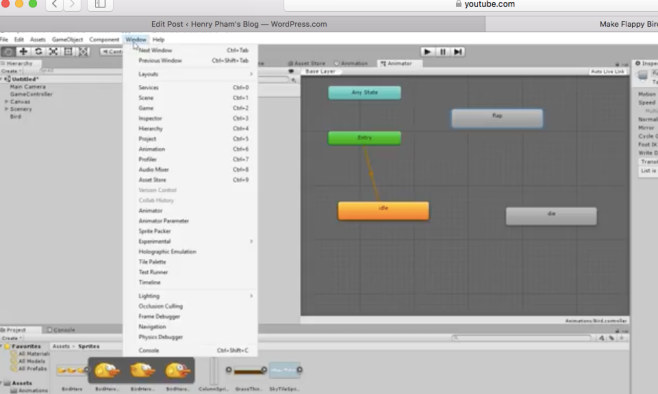
    • Show tab Animation (Near Scene and Game) or by Click menu WINDOWS -> Select Animation.
    • On the right window, select bird (imported) -> see on tab Animation -> Create
    • Screen Shot 2018-11-30 at 15.46.37
    • => Create new folder (named) -> Create different frame -> drag the accordingly  slide of image to created frames. We have frame: flag, die
    • Screen Shot 2018-11-30 at 15.51.39
    • Using Animator to control: (Windows menu -> Animator)
    • Screen Shot 2018-11-30 at 15.52.55.png
    • Make transition to control animation:
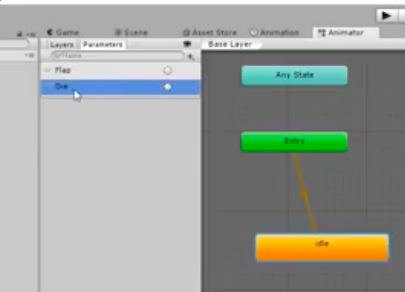
      • Create parameter first: Flag an die
      • Screen Shot 2018-11-30 at 15.55.55
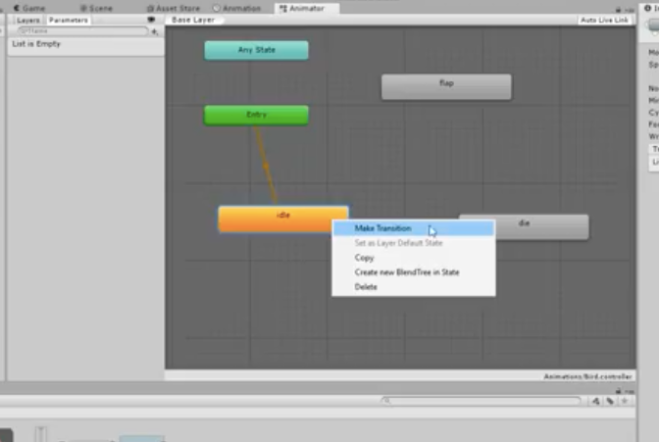
      • Then making transition
    • Screen Shot 2018-11-30 at 15.54.36.png
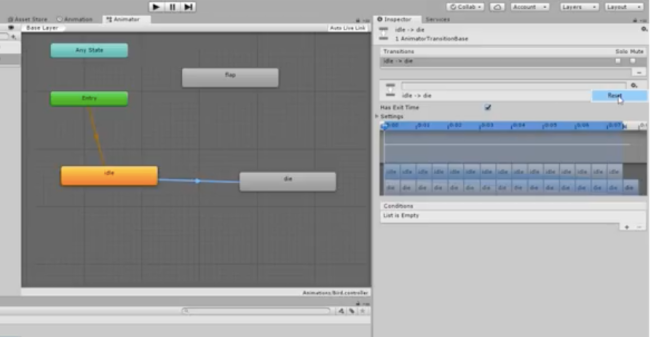
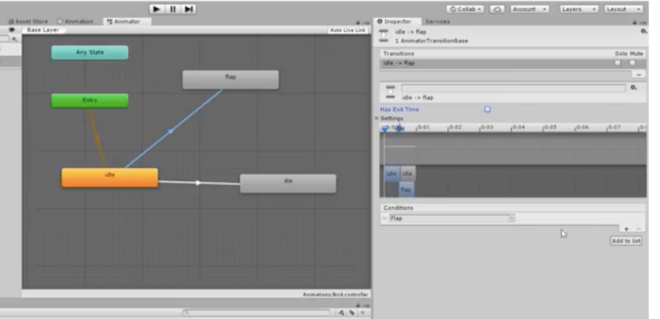
    • Draw Transition from Idle – Die, click on this line -> see property -> Reset default setting
    • Screen Shot 2018-11-30 at 15.59.08.png
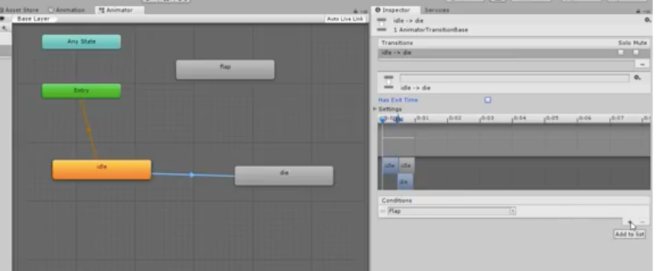
    • Untick, create new condition, select parameter die:
    • Screen Shot 2018-11-30 at 16.00.56
    • Do the same with transition from Idle to Flap:
    • Screen Shot 2018-11-30 at 16.03.35.png
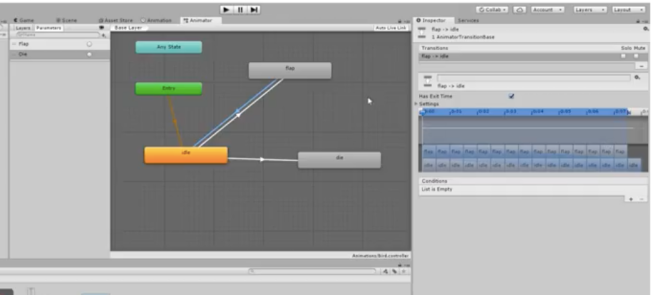
    • Create reverse back transition from Flag to Idle (Keep the default setting as it is)
    • Screen Shot 2018-11-30 at 16.04.59.png
  5. Apply rigid body to character:
    1. Click bird
    2. Insert component Regid body 2D
    3. Insert collider (Polygon, circle …) (before must create collider box for ground which will prevent object go through)
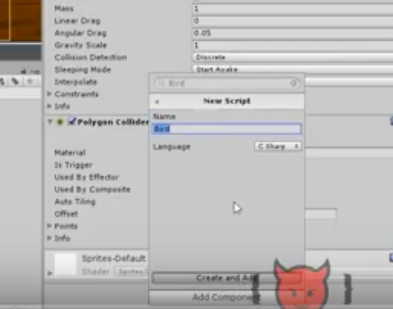
  6. Add script for bird
    • Right click and see property
    • Create new script
    • Screen Shot 2018-11-30 at 16.11.03
  7. Some code:
    • Moving: rgb = GetComponent<rigidbody2D> ();
    • ani = GetComponent<Animator>();
    • rbg.Addforce(new vertor upforce());
    • void OnCollision2D(){
      • ani.Settrigger(‘die’);
      • GameControl.Instance.Die();
    • }

How to config localhost on MacBook ?

  1. Step 1:
    • Install Python: by default, MacBook was installed Python already. So let check version of Python: Python -V (V capital)
    • if not, search and install.
  2. Step 2:
  • # If Python version returned above is 3.X

python3 -m http.server

  • # If Python version returned above is 2.X

python -m SimpleHTTPServer

by default, it takes the port 8000 for localhost, if you want to set other port, type:

python -m SimpleHTTPServer 8080

Screen Shot 2018-11-11 at 17.46.03

3. Check folder:

by default, it points to http://localhost/~User/

Copy the folder of web to this folder (by Finder -> Go to folder)

Test: http://localhost:8080/ar/


Practice with AR studio

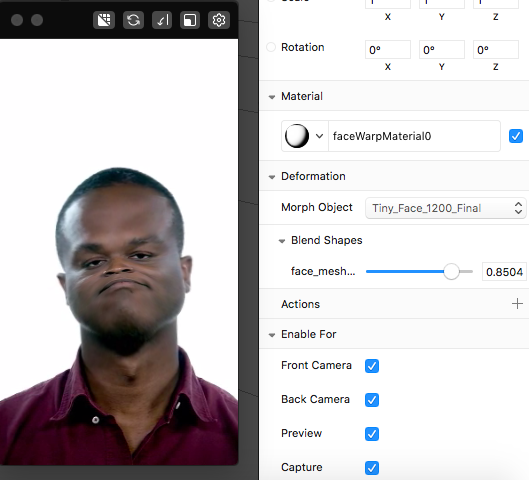
I. Changing the Shapes of Faces

  1. To get started, open Spark AR Studio and create a new project.
  2. Insert Face Mesh (From 3D objects)
  3. Go to the Inspector panel (right window) -> Click + Deformation -> Select download 3D object from sample https://origincache.facebook.com/developers/resources/?id=Tiny-Face.zip
  4. Picture as below: Screen Shot 2018-11-08 at 21.24.14

II. Adding Retouching

  1. To get started, open Spark AR Studio and create a new project.
  2. Insert Face Mesh (From 3D objects)
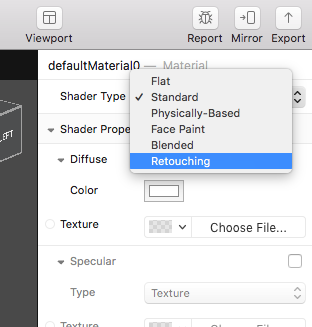
  3. From the face mesh is in the scene, go to the Inspector panel and click + next to Material
  4. Then, double-click the material you’ve created to inspect its properties.Screen Shot 2018-11-08 at 21.35.58
  5. Then from right window, select Shader Type, select Retouching
  6. Then update these parameters with values what you want:
    • Skin Smoothing to 83%.
    • Eye Whitening to 58%.
    • Teeth Whitening to 28%.
  7. You can also select Fullscreen for this effect

III. Adding a Hand Tracker

  1. Create project
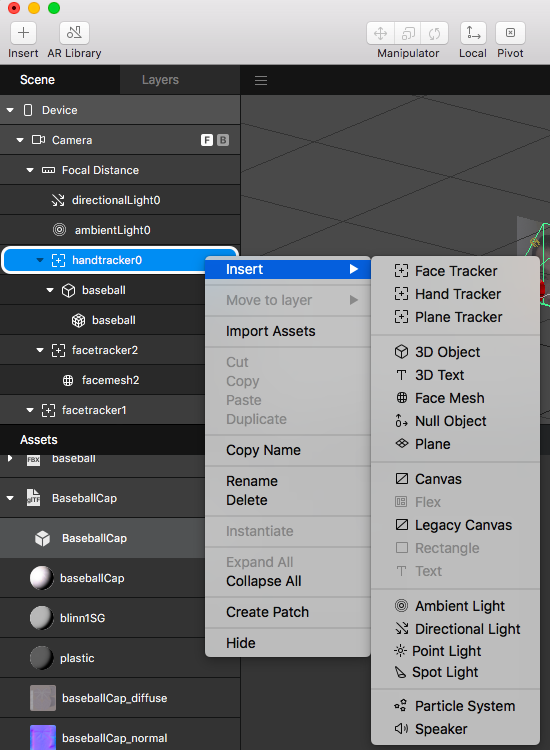
  2. Insert -> Hand tracker
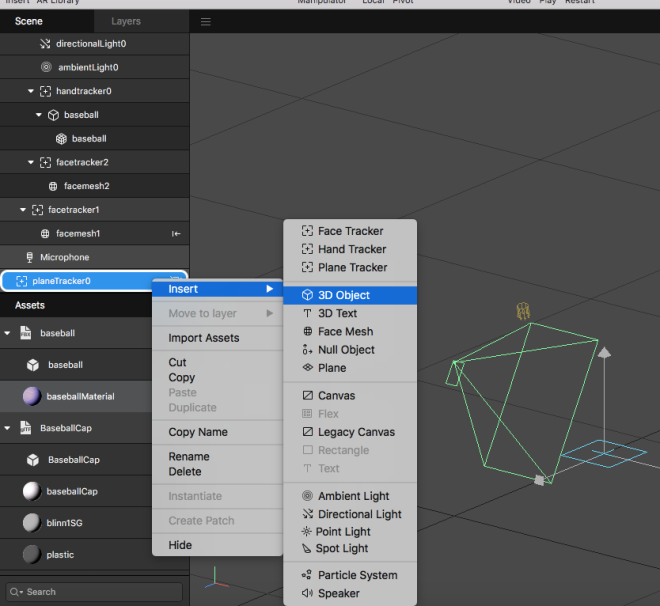
  3. Right click on Hand tracker -> Insert 3D object (By this way, it automatically maps object to the Hand tracker)

Screen Shot 2018-11-09 at 09.50.26

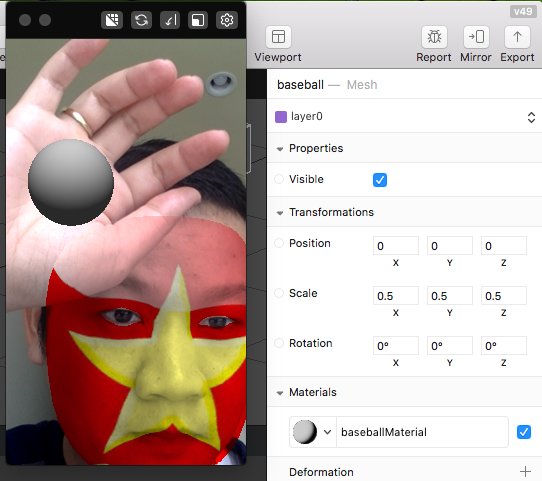
4. To scale object, click and see the right window property, customize our scale (x,y,z)

Screen Shot 2018-11-09 at 10.08.06

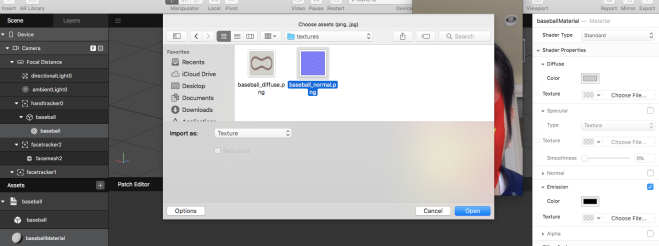
5. You can customize the skin for the ball: Right click on BaseBall -> in the right window, select Texture -> choose the file

Screen Shot 2018-11-09 at 10.13.53

IV. Plane Tracker

  1. To insert a plane tracker:
    • Click Insert.
    • Select Plane Tracker.
    • Click Insert.
  2. Any video you were using will no longer be visible because it change the point view of camera
  3. Create project
  4. Insert -> Hand tracker
  5. Right click on Hand tracker -> Insert 3D object (By this way, it automatically maps object to the Hand tracker)Screen Shot 2018-11-09 at 14.18.30

V. Segmentation

  1. Select “Camera”, then view the Spector panel, click on + Segmentation.
  2. You will see the “Segmentation Mask Texture” in the Texture in left window.
  3. Insert a Rectangle ( It is a child of a Canvas automatically).
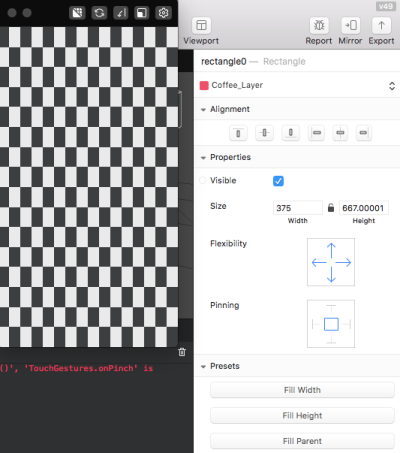
  4. Select Fill Parent in the Inspector panel (To full all the Scene)Screen Shot 2018-11-09 at 21.15.21
  5. Insert -> Hand tracker
  6. Create New Material: Assess -> create new material
  7. In the Inspector window, tick Alpha option, and apply for “Segmentation Mask Texture” created at previous step.
  8. Selection option: Invert. Select color in Diffuse.

    VI. Building Effects with 3D Objects https://developers.facebook.com/docs/ar-studio/tutorials/building-an-effect-with-3d-objects

    VII. Adding Text to Effects

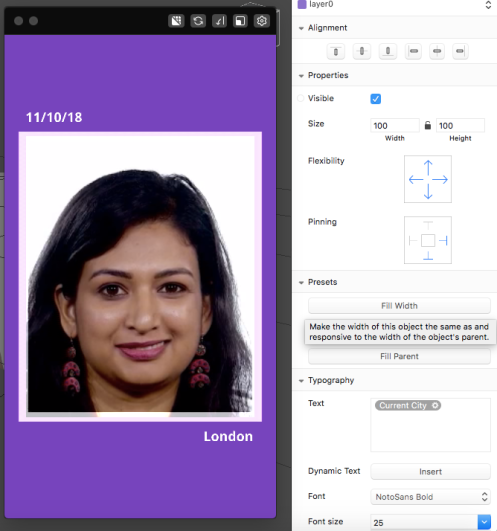
    Screen Shot 2018-11-10 at 09.53.11

VIII. Using Particles

  1. Create new project
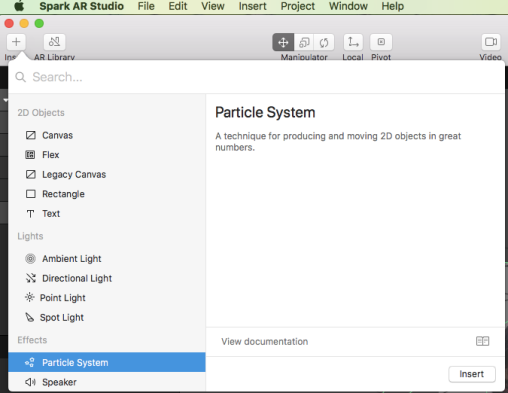
  2. Insert Particle

Screen Shot 2018-11-10 at 10.03.57

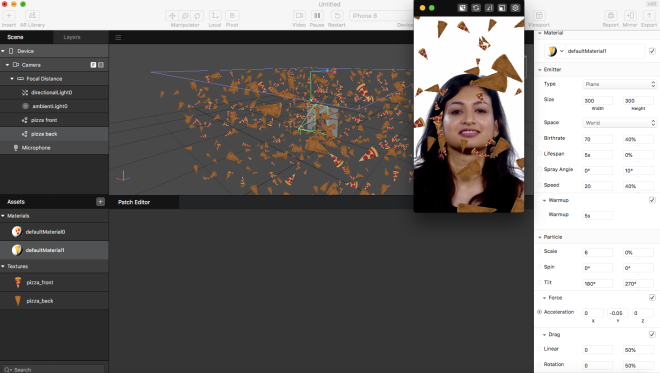
3. Edit material property

Screen Shot 2018-11-10 at 10.46.57.png

IX. Animating Objects with Skeletons

Screen Shot 2018-11-10 at 14.18.08

XI. Occluder

Adding an occluder can make a 3D scene more realistic, by hiding things that would be hidden in real life.

For example, in the image on the left there’s no occluder. The arm of the glasses is visible when it should be hidden by the head.

On the right, we’ve added an occluder:

Making an Occluder

Occluders are made of an object, with a material applied to it.

You can create and configure the occluder material in Spark AR Studio.

Occluder Objects

Any 3D object can be used as an occluder, once you’ve applied an occluder material to it.

If you’re occluding the face like in the example above, use a face mesh. This will cover the face and respond to its movements.

Occluder Materials

Once you’ve created a material, in the Inspector panel change:

  1. Shader Type to Flat. This shader is more performant than the Standard shader that most materials are set to by default. It doesn’t omit or respond to light, which is fine for the occluder material, as it won’t be visible.
  2. Opacity to 1%. The material will look transparent, but still hide objects behind it. Setting Opacity to 0% wouldn’t hide the objects behind it.

You might want to check the box for Double Sided. For example, so the back of the face mesh is also occluded if the user turns their head to the side:

XII. Visual programming

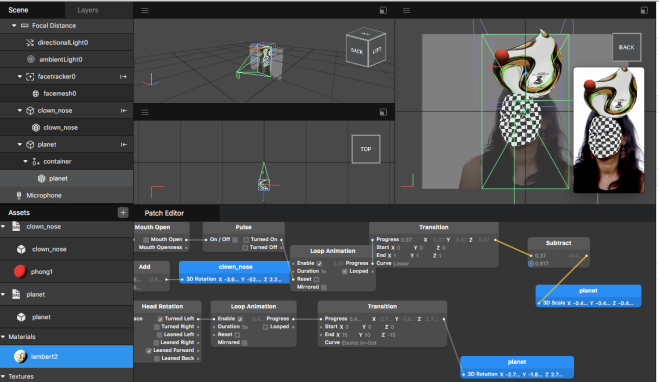
Screen Shot 2018-11-10 at 22.09.51

Moving scene objects with the face tracker

The simplest thing you can do is bind the movement of a scene object to a face tracker, so that the object moves with the face. To do this, insert a face tracker patch and then go to your object’s properties and click the dot next to Rotation. You should now see a face tracker and object patch in the Patch Editor.

Click the Rotation port on the face tracker patch and drag to the port on the object patch. Once the patches are connected, click Run to see it in action. Whenever your head moves, your object should move with it.

Using the face tracker to control animation

You can set an animation to begin and end when triggered by specific actions on a face. In the example below, the object is set to appear if someone opens their mouth. Then, if they lean their head to the right, the object changes position. If they close their mouth, the object disappears.

By connecting the Face TrackerHead Rotation and Mouth Open patches via the Tracking Data ports, we’re telling Spark AR Studio that it should be using the information from the face tracker to look for an open mouth or a leaned head.

Using boolean signals to start animations

Both Mouth Open and Head Rotation are boolean signals, which means it can either be happening or not happening. Patches like Mouth Openness have scalar signals.

If you want to use a boolean signal to start an animation, you’ll need to use the Pulse patch to transform the signal into a discrete event.

Using logic

You can use logic to make your animation react to a specific set of conditions. For example, you can create a patch graph that makes a ball drop from top to bottom if the head is tilted in either direction. To do this, us the Or patch to indicate that the animation should occur if either or the other action happens.

Here, the Or patch is placed after Head Rotation so that it can take both the inputs from the face tracker and trigger the movement if the head is leaned left or right.

Recreating a tutorial

In the Basics of Scripting tutorial, we explain how to make pizza fly into your mouth when you open it. Use this example to create this effect with visual programming.

Using screen interactions

You can use interactions such as a tap to make your effect respond to specific actions on the screen. In this example, we’ve used the Object Tap patch to make an object change position when someone taps directly on it. You also use Screen TapPanPinch or Rotate to trigger or control interactivity in your effect.

Using face gestures and counter

You can also use face gestures to control aspects of your effect. Here, we’ve used Smile to trigger different hats to appear, but you could also use BlinkEyebrows LoweredEyebrows RaisedRight Eye ClosedLeft Eye Closed or Smile to something similar. These patches must be connected to a Face Tracker patch to work properly.

We’ve also used Counter above to control when each hat appears. Counter allows you to track inputs, in this case smiles, and their count. We’ve set a maximum count to 3 here, which corresponds to three hat options we’ve added to the effect. Each hat is matched with a count number from 1 to 3, which triggers whether it’s visible in the scene or not.

Using screen interactions to control location

You can use screen interactions such as Screen Tap or Screen Long Press to not only control when things happen in your effect, but also to control how they happen. In this example, we’re using Screen Long Press to control where an object is located on the screen.

To do this, we used 2D Point Unpack to break the location of a screen press into it’s individual X and Y coordinates. We then use Multiply to change those coordinates by a set value. You could also use any math patch to make this change. In order to bring those coordinates back together, we use Point Pack. In this case, the object we are controlling the location of is 3D, so we used Point Pack instead of 2D Point Pack.

Using Runtime

The Runtime patch tracks the number of seconds that have passed since your effect started to run. One way you can use Runtime is to control how long something appears on the screen.

Here, Runtime connected with Offset tells the effect to check how long the effect has been running and compare against the offset we define. Here, we’ve used Less Than to define the offset as 3 seconds. This means that the text will only be visible when the runtime is less than 3 seconds.

For this example, we’ve also used Screen Tap to reset the timer, so that the text reappears when someone taps the screen. After 3 seconds, it will disappear again.

Using Facial Gesture Recognition Patches

In the example patch graph below, we’ve used all the facial gesture recognition patches in one effect. Each facial gesture triggers a different plane to become visible, creating an effect that can cycle through interactions that are tied to specific facial gestures.

Source: https://developers.facebook.com/docs/ar-studio/docs/

How I start with Spark AR facebook

Để bắt đầu dự án với Spark AR của Facebook, bạn cần triển khai các bước như sau:

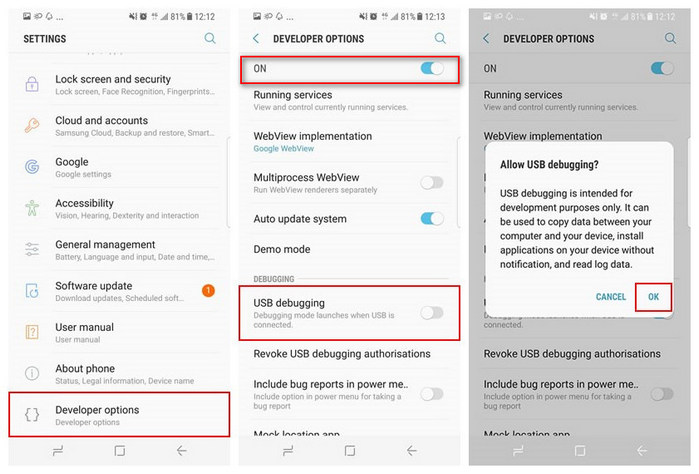
Với smart phone, bạn phải enable USB debugging mode, ví dụ với Samsung note 8 như sau:

  • Step 1: Go to your Samsung Note 8 “Application” icon and Open Settings option.
  • Step 2: Under Settings option, select About phone, then choose Software Information.
  • Step 3: Scroll down the screen and tap Build number several times until you see a message that says “Developer mode has been enabled“.Enable Developer Option on Note 8
  • Step 5: Select on the Back button of Settings and you will see the Developer options menu under Settings, and select Developer options.
  • Step 6: Slide the “Developer Options” button to “On” and check “USB debugging“.
  • Step 7: You will see a messages “Allow USB Debugging“, click “OK“.
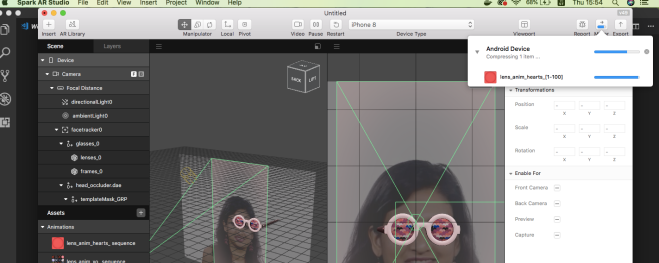
  • Quay trở lại Spark AR studio, từ project của bạn, chọn Mirror ở góc trên bên phải để xuất Project ra test trên Smartphone với Spark AR player đã cài.Screen Shot 2018-11-08 at 15.54.21

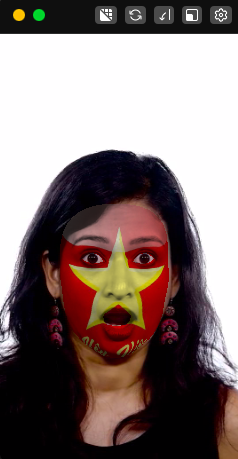
Và đây là ứng dụng test đầu tiên của mình với lá cờ Việt Nam, trông cũng ngầu đấy nhỉ !

Screen Shot 2018-11-08 at 16.26.26